The Warmup DCM-PRO Floor Heating System combines the benefit of an anti-fracture membrane with the comfort of heated tile floors. The DCM-PRO Membrane can be installed over wood and concrete subfloors, as an anti-fracture membrane or simply a safer way to lay heating cables. The DCM-PRO Cable is then installed in the areas where heat is desired. Check our data sheets and manuals for recommended spacings. You can begin tiling immediately, no waiting is necessary. However, the floor should be allowed to cure before grouting.
SHOULD I USE A MODIFIED OR UNMODIFIED THIN-SET?
Below
The DCM-PRO Membrane is available in two options, fleece-backed or peel-and-stick, offering great versatility for your installation preference.
With an effective self-adhesive backing, Warmup’s DCM-PRO Peel-and-Stick membrane does not require any tile adhesive for it to be firmly attached to the subfloor. Simply peel off the backing from the membrane and stick into position. The DCM-PRO Peel-and-Stick membrane offers a quick and hassle-free installation of Warmup Underfloor Heating and can be installed by a qualified electrician or tiler in as little as 30 minutes.
With fleece-back membrane, we recommend the use of modified thin-sets as they are more suitable for heated tile floor installations. But both modified and unmodified adhesives have been trialed and deemed appropriate by Warmup and its industry partners. Make sure to follow all manufacturer recommendations when mixing and applying thinset.
WHAT SIZE TROWEL SHOULD I USE?
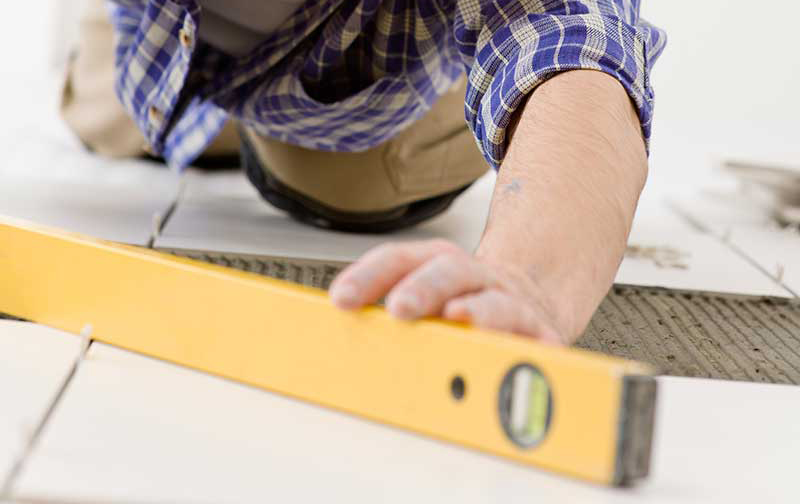
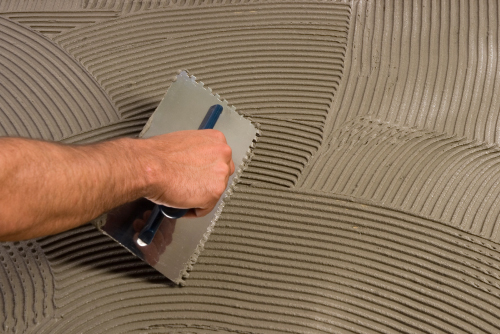
The DCM-PRO Membrane should be installed using a 1/4” X 1/4” trowel. The DCM-PRO Membrane should be pressed into the mortar (body weight or roller), pressing on all edges. Periodically lift the membrane and check to assure full transfer of the mortar to the backside of the membrane.
Above
Warmup allows modified, unmodified & self-leveling mortars and adhesives over its membrane. This is a fantastic benefit, allowing the user to install all format tiles, from mosaic to large format. Using self-leveling over the membrane (3/8” min.) also paves the way to lay other floor coverings over the system, such as wood, carpet or LVT’s. In some instances, installers prefer to ‘two-step’ the installation by leveling the cable over the membrane, then tiling above with their choice of thinset.
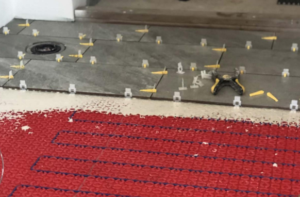
When using the ‘one-step’ method and tiling directly over the cable and membrane, always apply some adhesive over the membrane with a flat trowel (or the flat side of a trowel, or even a rubber float) in order to fill all the gaps and voids and ensure full contact of the cable for heating purposes. Then use the notched side for tiling.
Your choice of thinset and trowel over the cable and membrane is dependent on the flooring selection and specific tile size and thickness. Please refer to your flooring professional or thinset manufacturer guidelines.
- LATICRETE®: Laticrete 254, 4-XLT or Laticrete TriLite
- Mapei®: Kerabond, Kerabond-T, Ultraflex TM LHT, etc.
- Ardex®: ARDEX X 5- ARDEX X 32- ARDEX X 77- ARDEX X 78- ARDEX X 7 R- ARDEX N 23- ARDEX FB 9 L
- CUSTOM®: MegaLite® Ultimate Crack Prevention Large Format Tile Mortar ProLite® Premium Large Format Tile Mortar Versabond®-LFT Professional Large Format Tile Mortar.
TIPS FOR HEATED TILE INSTALLATIONS
• Use some leftover insulation board or cement board to kneel on and apply weight to the membrane ensuring uniform adhesion to the subfloor. This also eliminates any unwanted cable damage.
• Before the thinset cures under the membrane, cut out a 12” long by 1” wide channel to lay down the Factory Splice on the heating cables power cord. The 1/4” to 3/8” offset will make it easier to level it with tile.
• Use a scrap piece of wood that spans 2 to 3 feet to level out the leveler when using the two-step method or when installing non-tile floor coverings.
MORE RESOURCES FOR HEATED TILES
Ready to start your next radiant heat project? Get a Free, Instant Quote or Contact Us for further assistance with your project.
Want to see our products in action? Visit our YouTube Channel for full installation videos, tips, and more!
![Which Underfloor Heating Is Best for Me? [Flowchart]](https://www.warmup.ca/wp-content/uploads/underfloor-heating-flow-chart-thumb-300x199-1.jpg)