Is there anything better than starting your morning with a warm shower? Imagine enhancing the experience with a heated floor that fits your schedule for the ultimate touch of luxury everyday.
The Warmup in floor heating system hides out of sight underneath your bathroom floor. The only way you know it’s there is when you walk into your bathroom and feel the delightful warmth on your feet. When combined with a curbless shower install, your bathroom will not only be exceptionally comfortable, but will also look modern and refined.
Benefits of a Curbless Shower
Curbless showers are much more accessible to use than traditional showers. Curbless showers reduce the risk of trips and falls while getting into and out of the shower. Many people have opted to switch to a curbless shower as they decide to age in place in their current homes.
A curbless shower also gives your bathroom a more seamless look and can really liven up a bathroom. Without a curb, installing in floor heating can often be done with just a single system, and the installation becomes much simpler too.
Benefits of In Floor Radiant Heating in a Shower
Not only are in floor radiant heating systems great at making people more comfortable, they’re energy efficient, too. Radiant heating systems warm the tile or stone on the floor and, because those materials are great at retaining heat, the floor radiates heat to people. This means that not only will your feet be warmer but your entire body will feel warmer from the in floor heating system.
This type of heating helps reduce the amount of heating needed from other sources, which often means you are able to lower the setting on your thermostat.
How to Install In Floor Heating to a Curbless Shower
1. Take Proper Measurements to Determine Dimensions
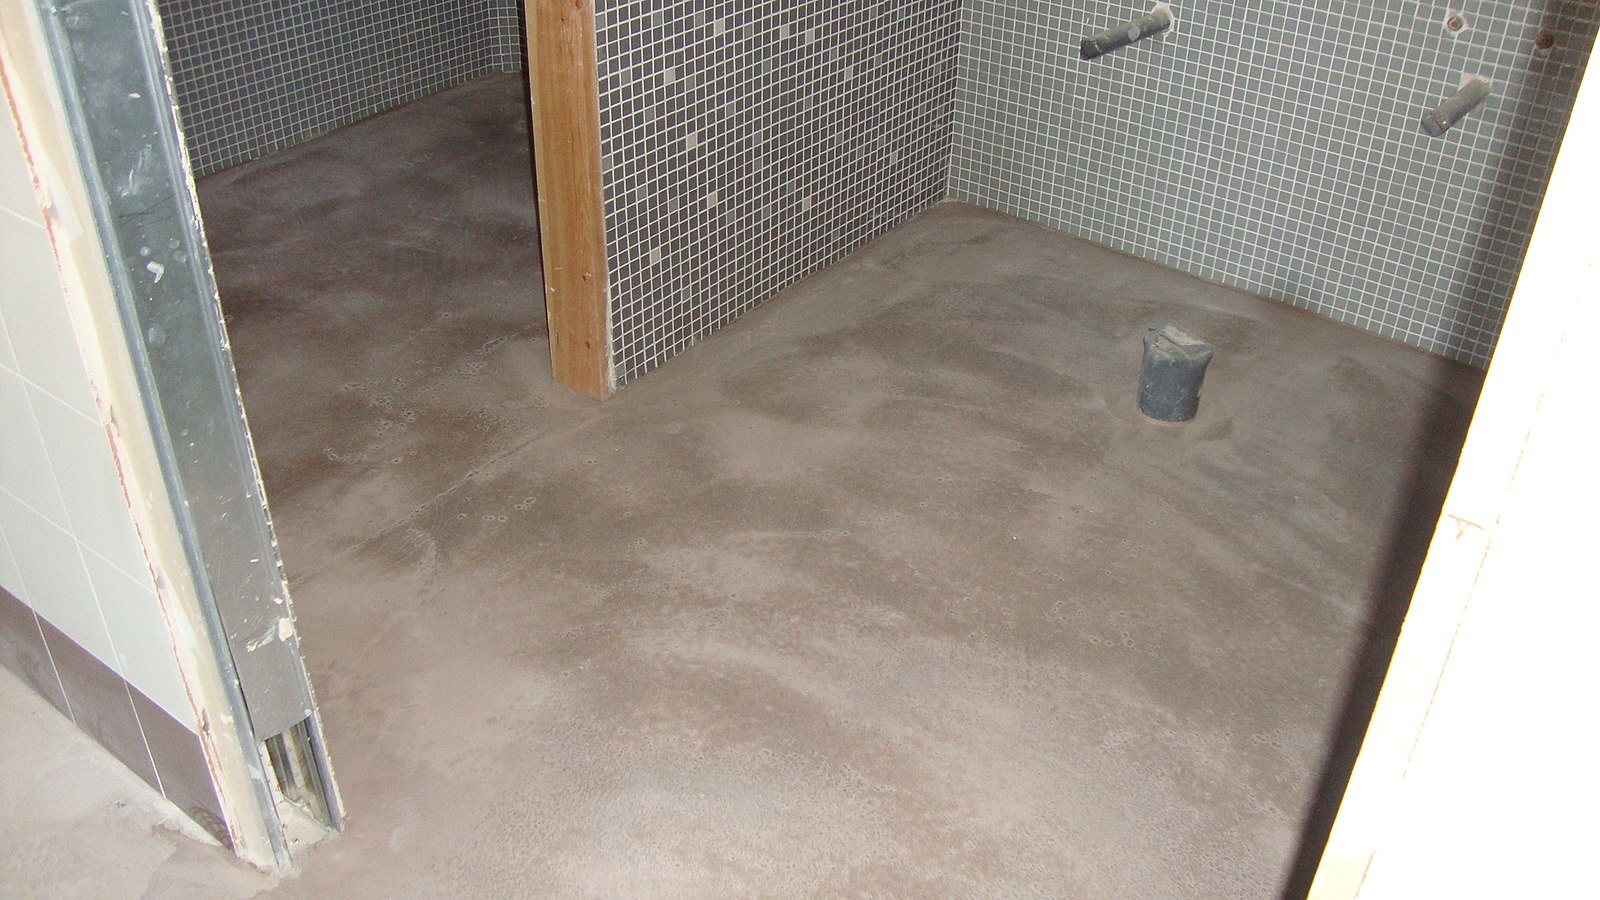
To start your in floor heating install, you’ll first need to take careful measurements to determine how much material you will need and the proper way to install the heating system. Sketch out the dimensions for your floor and mark things like:
- Location of power for thermostat
- Drain location
- Door location
- Toilet location
Keep in mind that the National Electric Code requires the in floor heating system to be installed on horizontal surfaces only. This is why curbless installations are much easier and a better choice overall.

Many people may decide to break their shower and bathroom floors into two separate systems even with a curbless shower install. By breaking the system into two separate heating zones it will be easier to change out tile only in the bathroom or only in the shower if you decide to do that later on.
2. Cut the Radiant Floor Membrane to Fit the Shower Dimensions
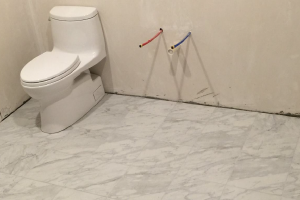
Once you have the right materials, it’s time to get to work. As with any project, always remember “measure twice, cut once”. The first step will be to measure and cut the radiant floor membrane to fit into the dimensions of your bathroom. Cut out the items you located previously, like the toilet and drain locations. After you’ve cut the membrane, be sure to do a dry fit to verify that everything fits perfectly. It is a lot easier to make adjustments if needed now than it will be later.
After doing the dry fit, use the proper type of thinset for your subfloor type to adhere the membrane to the subfloor. Be sure to clean the subfloor before applying thinset. A clean subfloor will promote a better installation of the membrane. The membrane should fit together securely without gaps. If using peel-and-stick, the product goes down fast without the use of thinset.
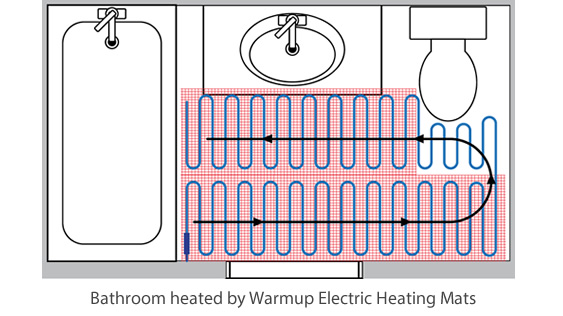
3. Install the Heating Cable Within the Membrane
Once the membrane is securely adhered to the floor, it’s time to install the heating cable. The heating cable lies in the valley between the “pegs” on the membrane. Use your hands to wind the flexible heating cable in a serpentine pattern. Don’t cross the heating cable over itself.
Warmup offers free layouts that show how to put the cable you’ve purchased into the space. 3 peg spacing is standard.

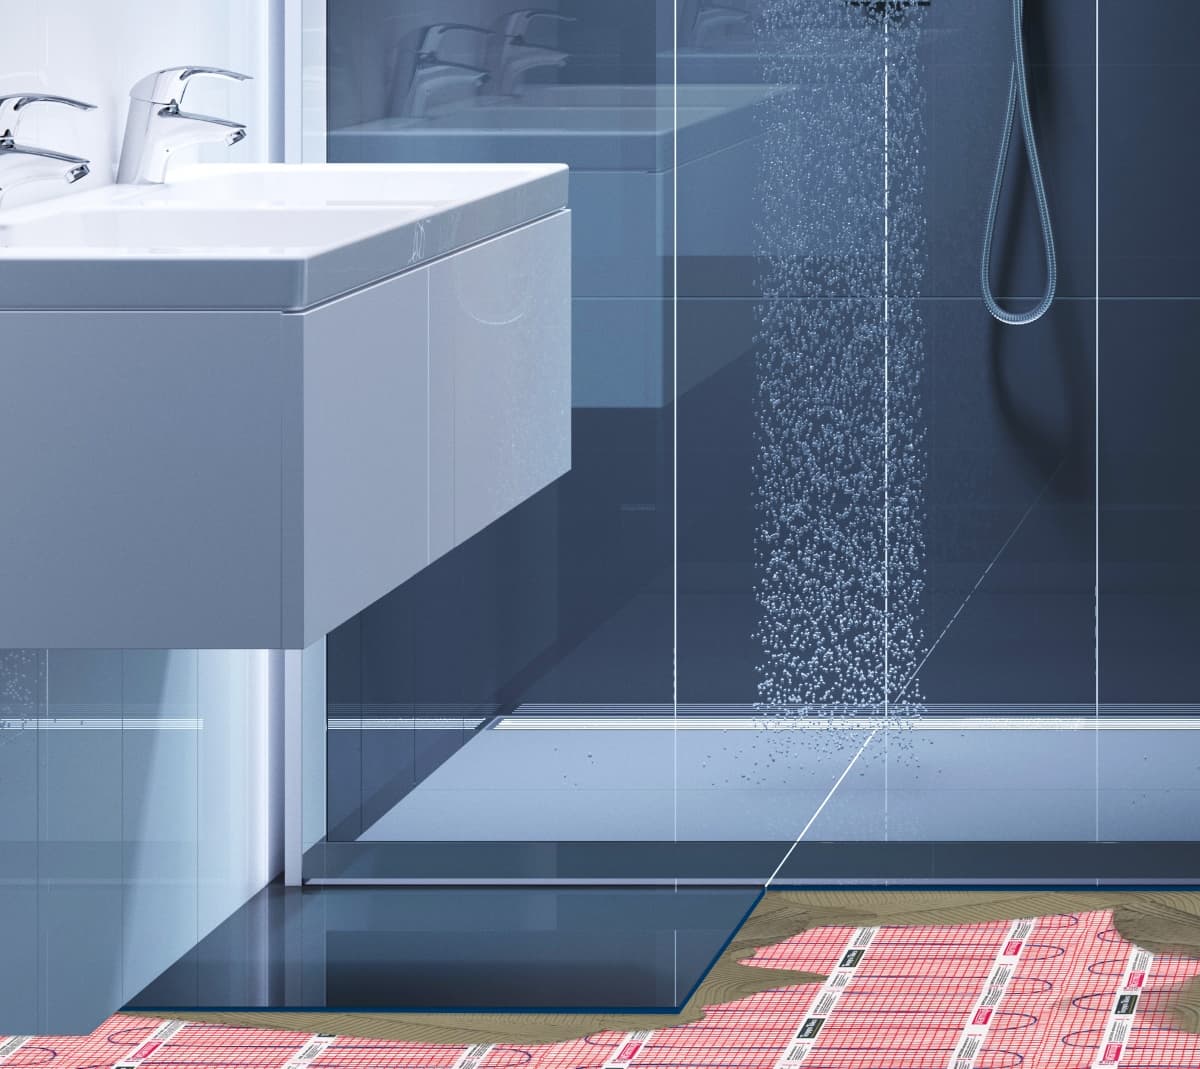
4. Add Waterproofing Membrane
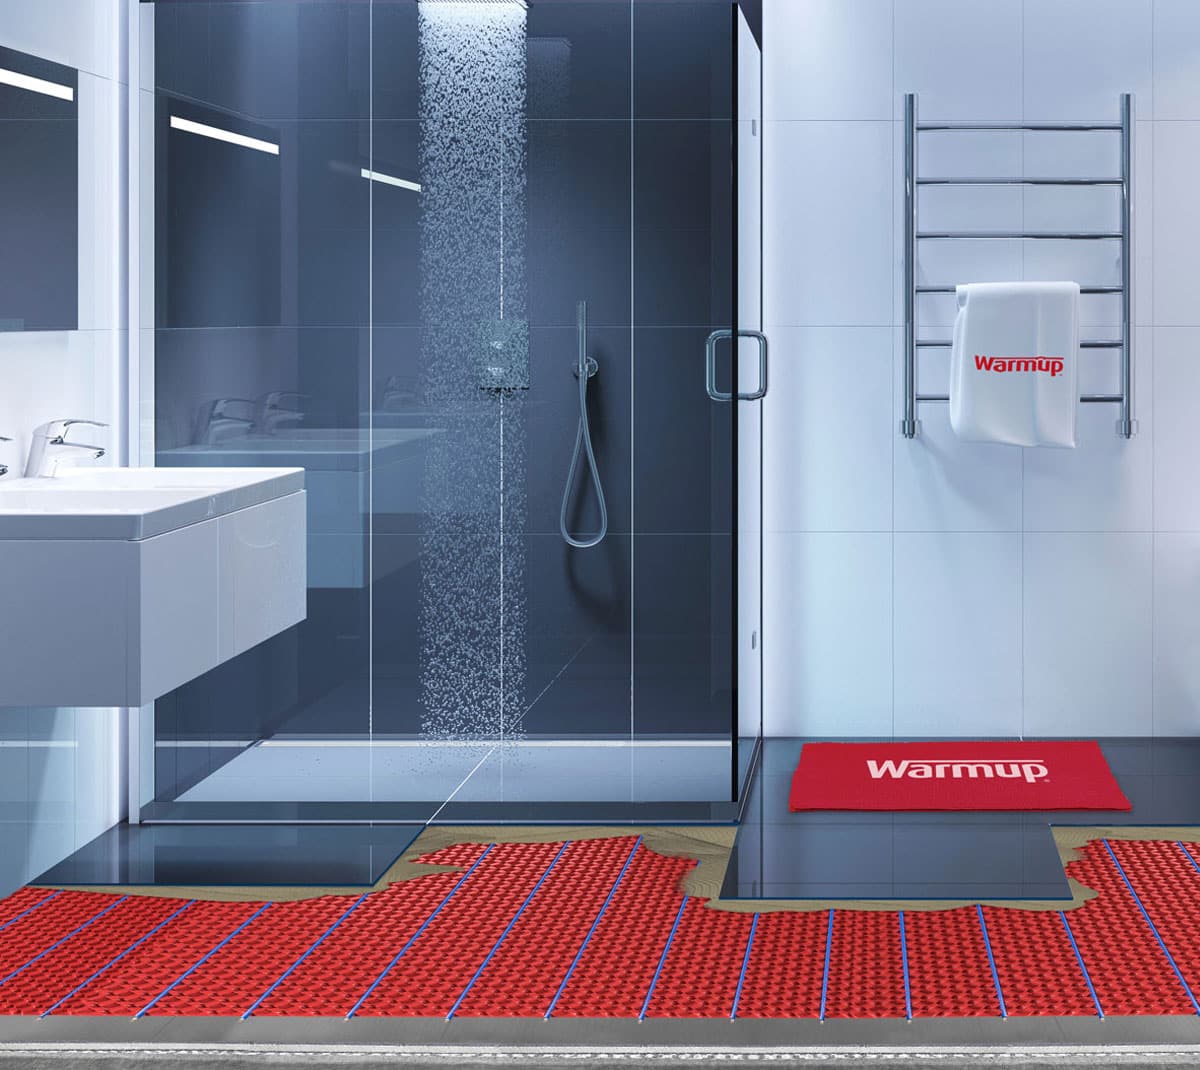
After the heating cable is installed, utilize Warmup’s 3-ply waterproof membrane to protect floors and walls under thinset tile installations from substrate cracks and moisture migration. It is comprised of 2 outer polypropylene layers and one inner polyethylene waterproofing membrane and exceeds testing requirements per ASTM 118.10. The range includes a 35ft roll of 5” wide membrane, along with outer corners and inside corners to complete waterproofing.. When looking at the installed membrane, it should appear fully sealed and waterproof. If gaps or spaces are noted, now is the time to fix them.
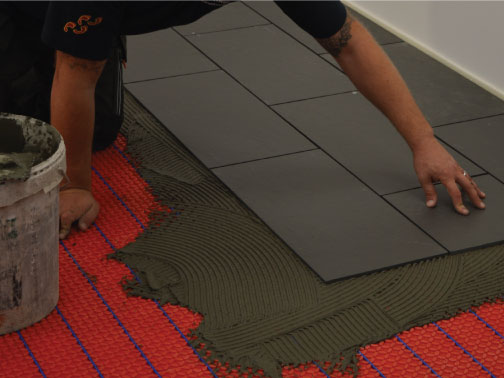
5. Apply Thinset
Now that the membrane is adhered to the subfloor, the heating cable is installed, and the membrane is properly sealed, it’s time for thinset. Use an unmodified thinset to cover the heating cables and prepare the floor for tile. Properly trowel the thinset just like you would do for any other tile installation.
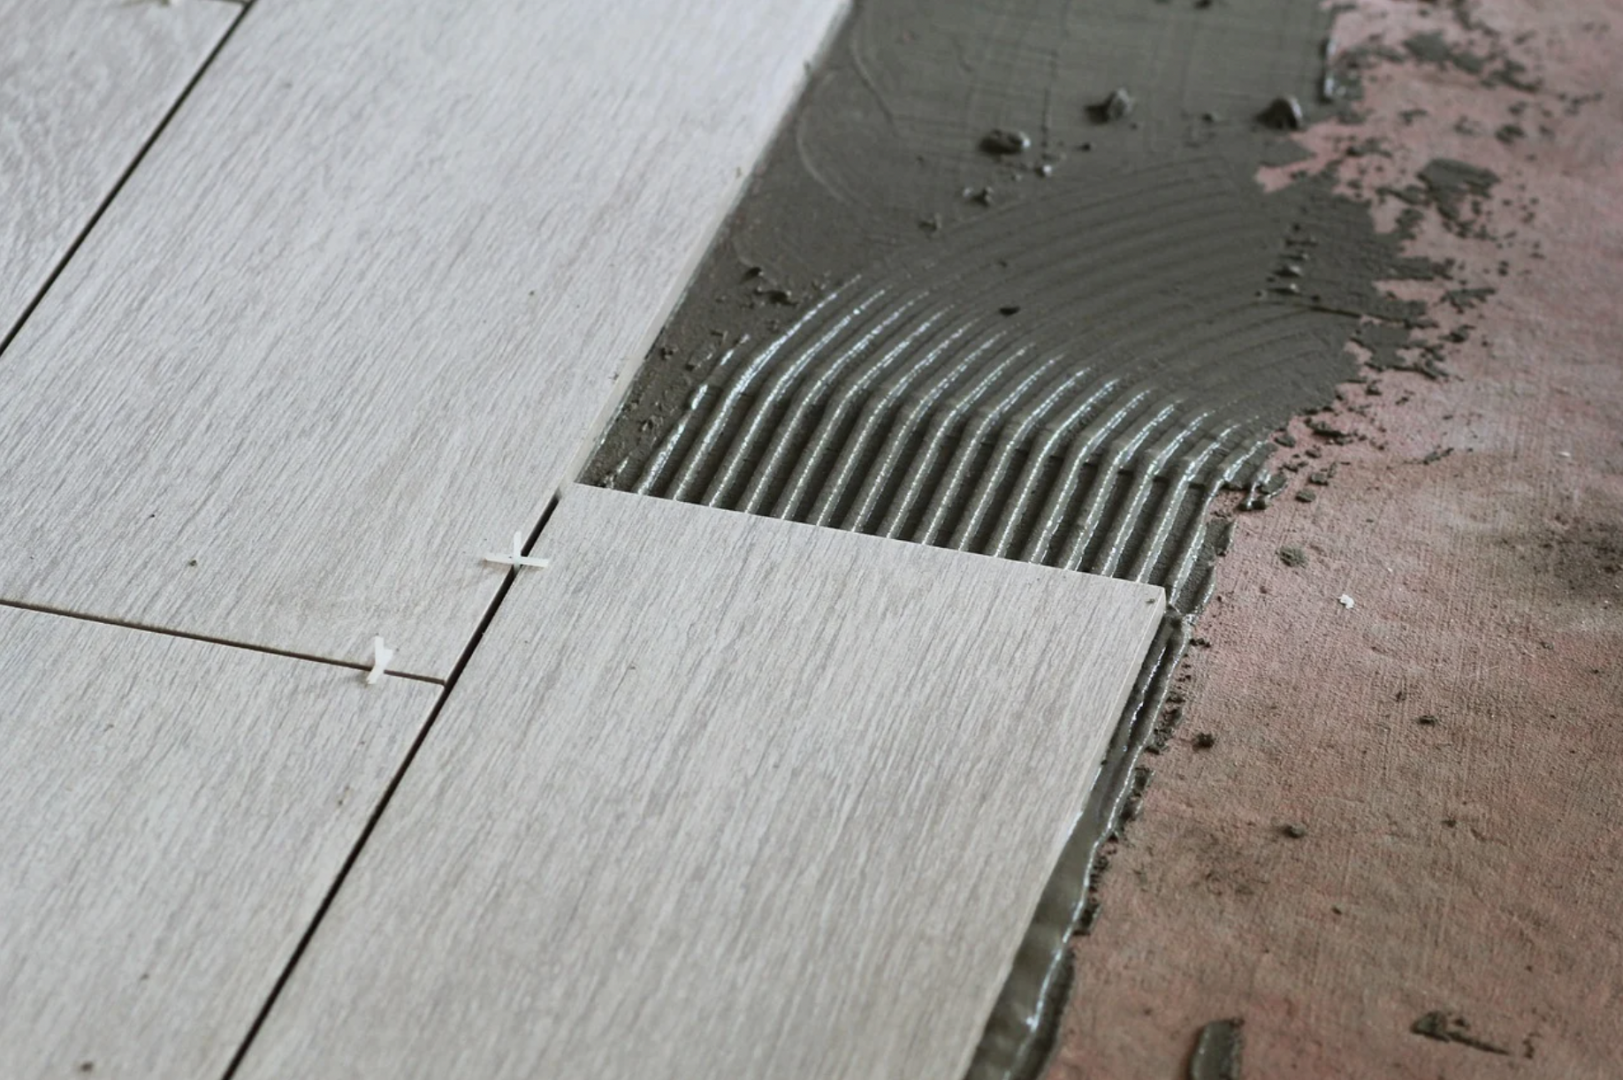
6. Install Tile or Stone Flooring
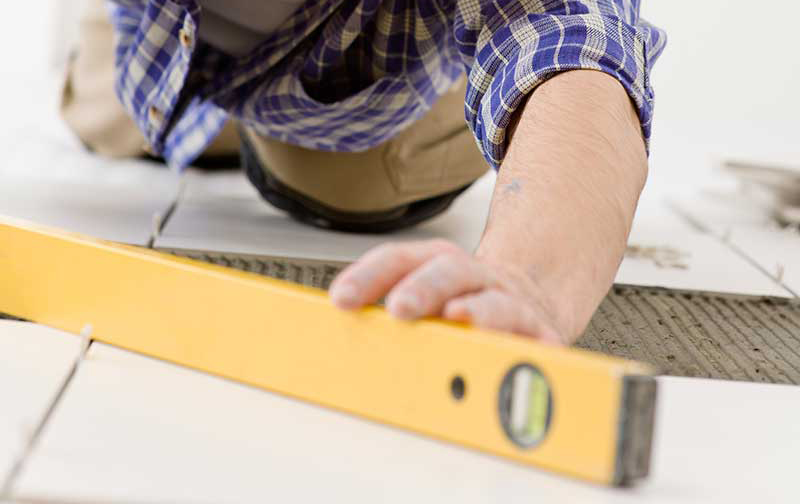
Install your choice of tile or stone flooring on to the thinset. Stone and tile work great with in floor heating systems due to their ability to retain heat. Use mechanical levelers to ensure that your new tiles sit flush and don’t lip.
7. Install the Thermostat
Now that your new heating system and flooring are installed, it’s time to finish up the electrical work and test it out. Use a qualified electrician to connect your in floor heating system and thermostat to the power source.
Realize In Floor Heating in a Curbless Shower with Warmup
Once the thinset has cured and the system connected, power the system on and verify that everything is operating correctly. Congratulations, it’s time to enjoy your new warm floors! For questions or to learn more about in floor radiant heating systems, reach out to Warmup today.